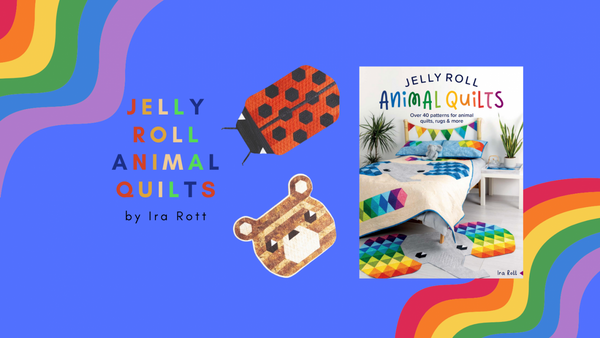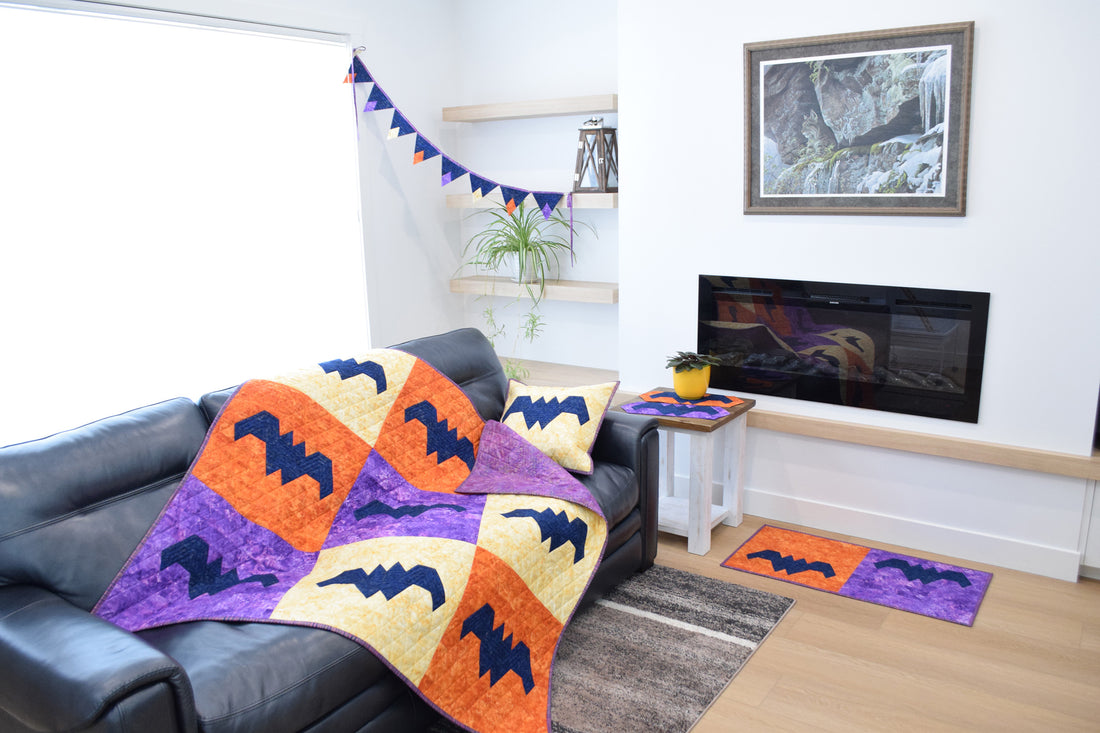
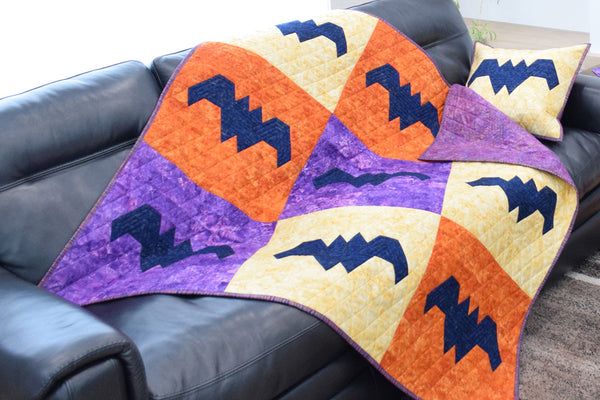
My new book "Jelly Roll Animal Quilts" features over 40 animal inspired projects, such as quilts, area rugs, wall hangings, placemats, mug rugs, and more. All are made from precut 2-1⁄2in fabric strips that are sub-cut into rectangles, and then turned into 60° shapes by trimming corners in a special way. In this post, I will explain the basics of cutting and piecing these shapes, which you can practice while making a charming bonus project - The Moonlit Bat Quilt & Pillowcase. Make sure to download the quilt pattern HERE first!

Cutting 60° Shapes
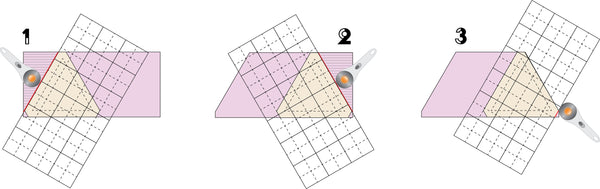
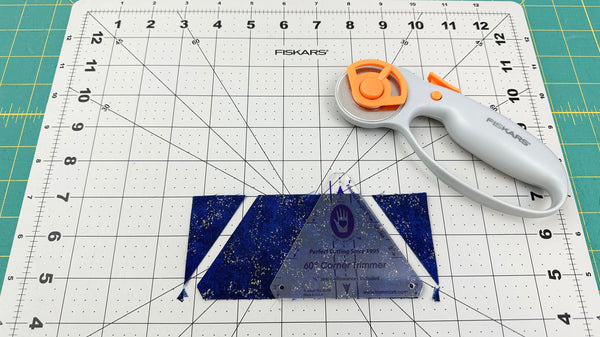
When cutting 60° shapes for the projects in this book, you will trim the corners off the rectangles using a 60° corner trimmer or a ruler with trimmed 60° corners. My favorite tools to use for this task are Marti Michell's 60° Corner Trimmer and Hex-N-More ruler by Julie Herman of Jaybird Quilts. Regardless of your template choice, it is crucial to avoid using rulers with pointy 60° corners. If the point of a ruler meets the corner, you will trim off the seam allowance and your shape will be too short.
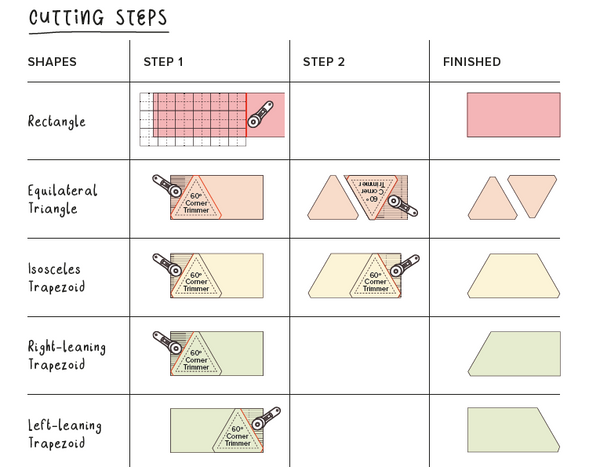
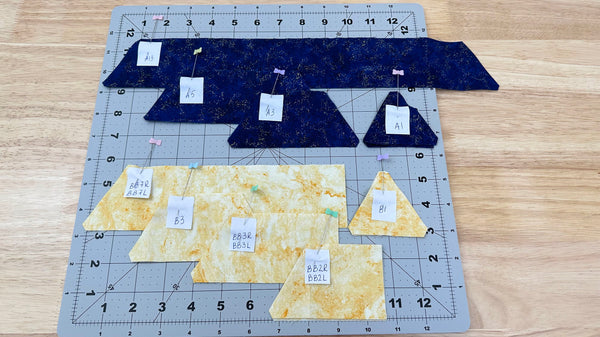
For the Moonlit Bat block, you will be cutting the following shapes from 2-1⁄2in fabric strips - rectangles, equilateral triangles, isosceles trapezoids, right and left-leaning trapezoids. Simply follow the steps as shown below for each shape.
If you do not have a special ruler, you can trace the 60° template provided in the book or print THIS FILE in actual size, then cut out 2 paper templates - one for trimming the sides and the other for trimming corners.
- Tape the first template behind your quilting ruler, aligning the side edge of the triangle with the ruler edge and the dashed line with the 1⁄4in mark on your ruler.
- Tape the second template on the back side of the same ruler or to another quilting ruler, aligning the trimmed corner with the edge of the ruler and the corner of the dashed line with the 1⁄4in mark on your ruler.
Here are a few additional tips for layering fabric strips prior to cutting:
- To cut symmetrical shapes, place two strips with wrong sides together and cut as one.
- To cut identical shapes, place two or more strips with right sides facing the same direction and cut as one.
- Equilateral triangles and isosceles trapezoids can be cut with multiple layers of fabrics facing either direction.
When cutting multiple layers, I love using Fiskars Rotating Self Healing Cutting Mat as it allows trimming corners faster and easier without moving the fabric pieces.
Making The Bat Block
Cut all the shapes listed in the pattern, and label them as you cut to keep all your pieces in order. To make labels, you can use masking tape, small sticky labels, or paper and pins.
A true 1⁄4in seam allowance is crucial for accurate piecing. Therefore, use a patchwork presser foot on your sewing machine and check your seams for accuracy. Shorten your stitch length for piecing to 1.5–1.6mm. The straight stitch needle plate is a bonus if you have it, as it prevents the leading edge from puckering when you start piecing. If you do not have the straight stitch needle plate, you can use a small piece of fabric as a leader to help you start sewing.
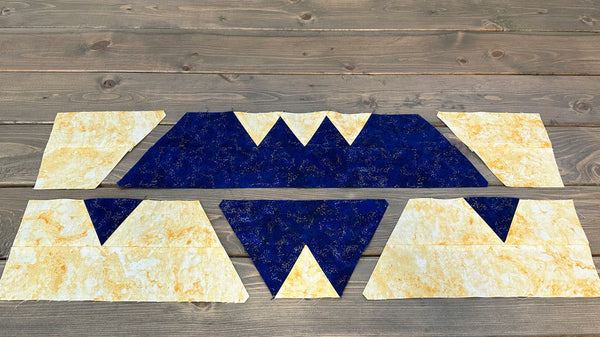
When you sew 60° shapes together, the corners will align perfectly without dog-ears, so there will be no points that stick out past the seam allowance. Simply pin and sew from corner to corner with a 1⁄4in seam allowance, distributing the fabric layers evenly; do not trim the sides to avoid further distortions.

Construct the main 6 units of the bat block following the pattern, then sew them together in the indicated order. For accuracy, press all seams open as you sew. Add 3 background strips to the top and bottom edges and your block is now finished, just trim the edges to 20 x 20in.
Finishing Quilt
Make 3 bat blocks with background B, 3 bat blocks with background C and 3 bat blocks with background D. Arrange blocks as shown in the pattern diagram and sew them together in rows, then sew the rows together. Make a quilt sandwich and quilt it as you like, then bind your quilt using 7 Jelly Roll strips.
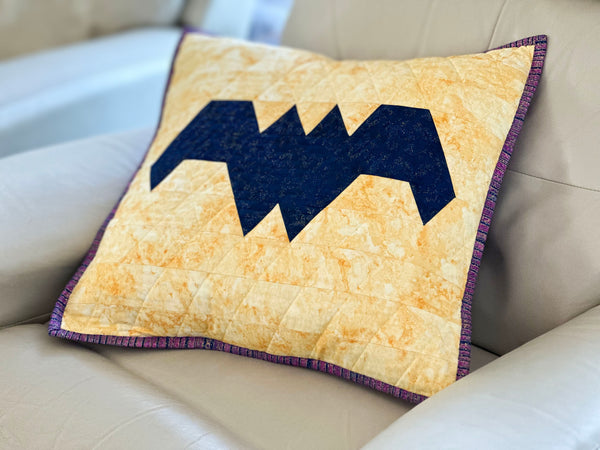
Finishing Pillowcase
Using 2 navy blue strips for the bat and 5 yellow strips for the background, make 1 bat block as described for the quilt. To finish the front of the pillowcase, make a quilt sandwich and quilt it as you like.
For the back of the pillowcase, cut 2 identical fabric pieces 20 x 13 1⁄2in. Finish one raw edge vertically on each piece as follows - Fold the raw edge to the wrong side by 3/8in and press; fold the hem over again, press then stitch closely along the first fold.
Lay the front (quilted piece) right side facing down and place the hemmed backing fabric rectangles on top with right sides facing up, so that the finished edges overlap in the center and the raw edges of the back align with the edges of the front. Pin and sew around with a 1⁄4in seam allowance. Bind your pillowcase using 3 Jelly Roll strips sewn together. The binding can be finished by sewing machine or by hand, as you choose.

- Barnes and Noble
- Indigo
- Amazon (affiliate link)
- Bookshop (affiliate link)
- Books a Million
- Angus & Robertson Australia
- Walmart USA
- Search Press UK